Brewing Guide
I could write too much just about brewing tea, but I’ll try to keep things simple, and with a focus on having a good experience with the tea. This post is a detailed overview of the technique I’ll have you use, then in later posts I’ll give specific brewing recipes. There are many other ways to do things, but this will work and give you good results.
Water
Use filtered water, or failing that, low-mineral bottled water. Just ordinary good drinking water that doesn’t taste like chlorine.
The teas I sent can all be brewed at boiling: that is, you bring the water up to a boil, then turn your kettle down to keep it just under a boil. If you have a whistling kettle, it should just barely make any noise. Another way to keep your water up to temperature is to use a vacuum thermos: fill it with boiled water, wait 20 seconds, dump it out, the refill and seal it. You can also just bring the water briefly back up to a boil when you need to; that’s slightly worse than the other techniques, but don’t worry about the difference for now.
Equipment
You’ll need a brewing vessel of about 100mL (80~120 or so). And a cup to drink from. A full set-up with a pitcher to pour the tea into, and a filter, is better.
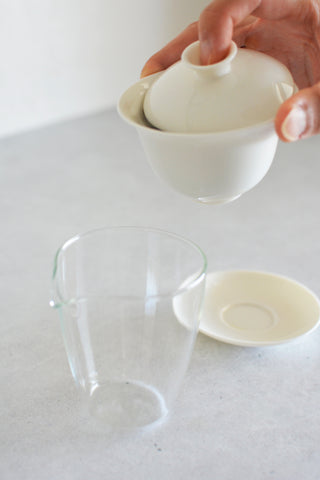
The process
These teas are all brewed similarly: pour the hot water into the teapot or gaiwan. Once it’s heated up, pour the water into your pitcher, and from there into the cup(s). Put one session’s worth of dry leaf in the pot, cover it, and let it heat for 30 seconds to a minute. Lift the lid and smell the dry leaf.
Wash
Before any real brews, you’re going to wash the leaf. Pour hot water in, cover, and after a very short time, pour it out. This “wakes up” the leaf, and gets it ready for reliable brewing (don’t skip this step, I’ve A/B tested and it makes a big difference). Most of the time there’s just a bit of aroma in this brew, and little taste. Pour it into the cup(s) then pour it away. If you have a tea pet like my fatso kitty, you can give it to them.
After rinsing the leaf and letting it steam another half minute or so, look at the wet leaf, and take a smell. It usually smells quite different from the dry leaf.
The brews
Pour the hot water over the leaf, and cover the pot. After a certain amount of time, pour the tea into the pitcher. If you have a gaiwan, you’ll need to push the lid slightly off-center to make a small opening.

For larger leaf teas it’s easier to keep the leaf in and pour the tea out. The smaller and more broken the leaf, the trickier this is, but that’s why it’s good to pour through a filter. If leaves come through, just dump them back into the gaiwan or pot.
Pouring into a pitcher is important if you’re sharing the tea. It lets everyone get a taste or two of each brew. It’s also important if you’re drinking alone out of small cups.
First brews
The first 3-4 or so brews of a tea give you the most aromatics. For most teas (certainly oolongs, whites, and usually shu), the second brew is the most loved.
Middle brews
After the initial few brews, there’s a first change in the flavor of the tea. Some of the initial aromas start to fade, and new flavors come up from deeper in the leaf.
Late brews
Once your brew times get distinctly over 1 minute, you’re into the deep leaf flavors. For some teas this isn’t very interesting, and it’s done. For some teas these brews are also very good and you get yet another set of flavors. Thick tea pots that hold the heat are better here. Make sure your water is as hot as you can get it.
Enjoy
Once you’ve gone through the process once or twice, it’s pretty easy, and shouldn’t be intimidating. It can be fun to get into all the details, and to learn all the different contradictory things you can do and learn why you’d do them … and you’ll eventually end out a tea master if you go far enough along that path. But it’s not necessary, especially when getting started. Enjoy the process, enjoy the tea, and share what you think of it, good or bad!